
The Step-By-Step Way to do a Project
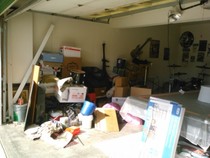
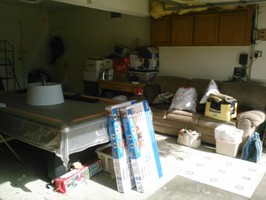
Garage left side before organizing and shelving installation.
Step #1
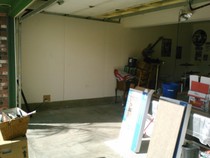
Garage left side after purging, sweeping, and cleaning.
Step #2
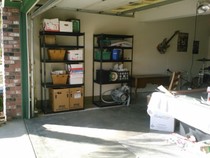
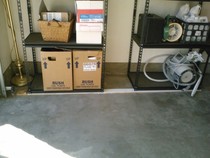
Garage left side after installation of shelves and addition of some items kept.
Step #3
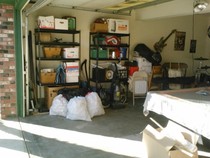
Garage left side installation of shelves with items to keep and recycle by client (plastic bags of cans).
Step #4
Notice the unwanted piece of molding used in front to slightly angle shelves (tilt) shelves back against wall. One way to increase safety and reduce shelves falling forward.
Step #2.5
USE LINK BELOW TO CALL OR TEXT FOR AN APPOINTMENT @ 805-302-2756.
More Before and After Project Pictures
Garage before
Right side, no shelving.
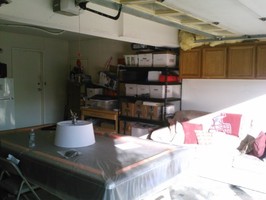
Garage after
Right side with shelving and better lighting.
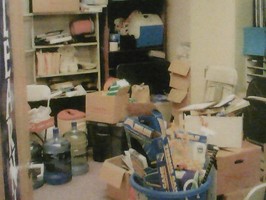
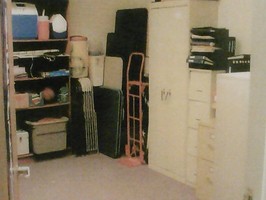
Before storage area
An unsafe and unproductive area for clients and staff.
After storage area
Clients and staff can easily find items in a safe way.
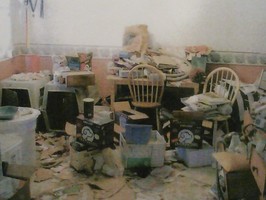
Dining room before
Health and safety issues.
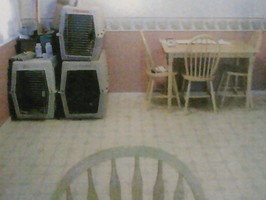
Dining room after
Clean and safe with un-needed items recycled, donated and some trashed.
See home and business project portfolios with a live consultation
USE LINK BELOW TO CALL OR TEXT FOR AN APPOINTMENT @ 805-302-2756
This client liked the portfolios of homes and businesses!
Comments: Planner was on time, made good suggestions and showed pictures of other projects. Planner followed up with a thank you note.